Monorail Con badge
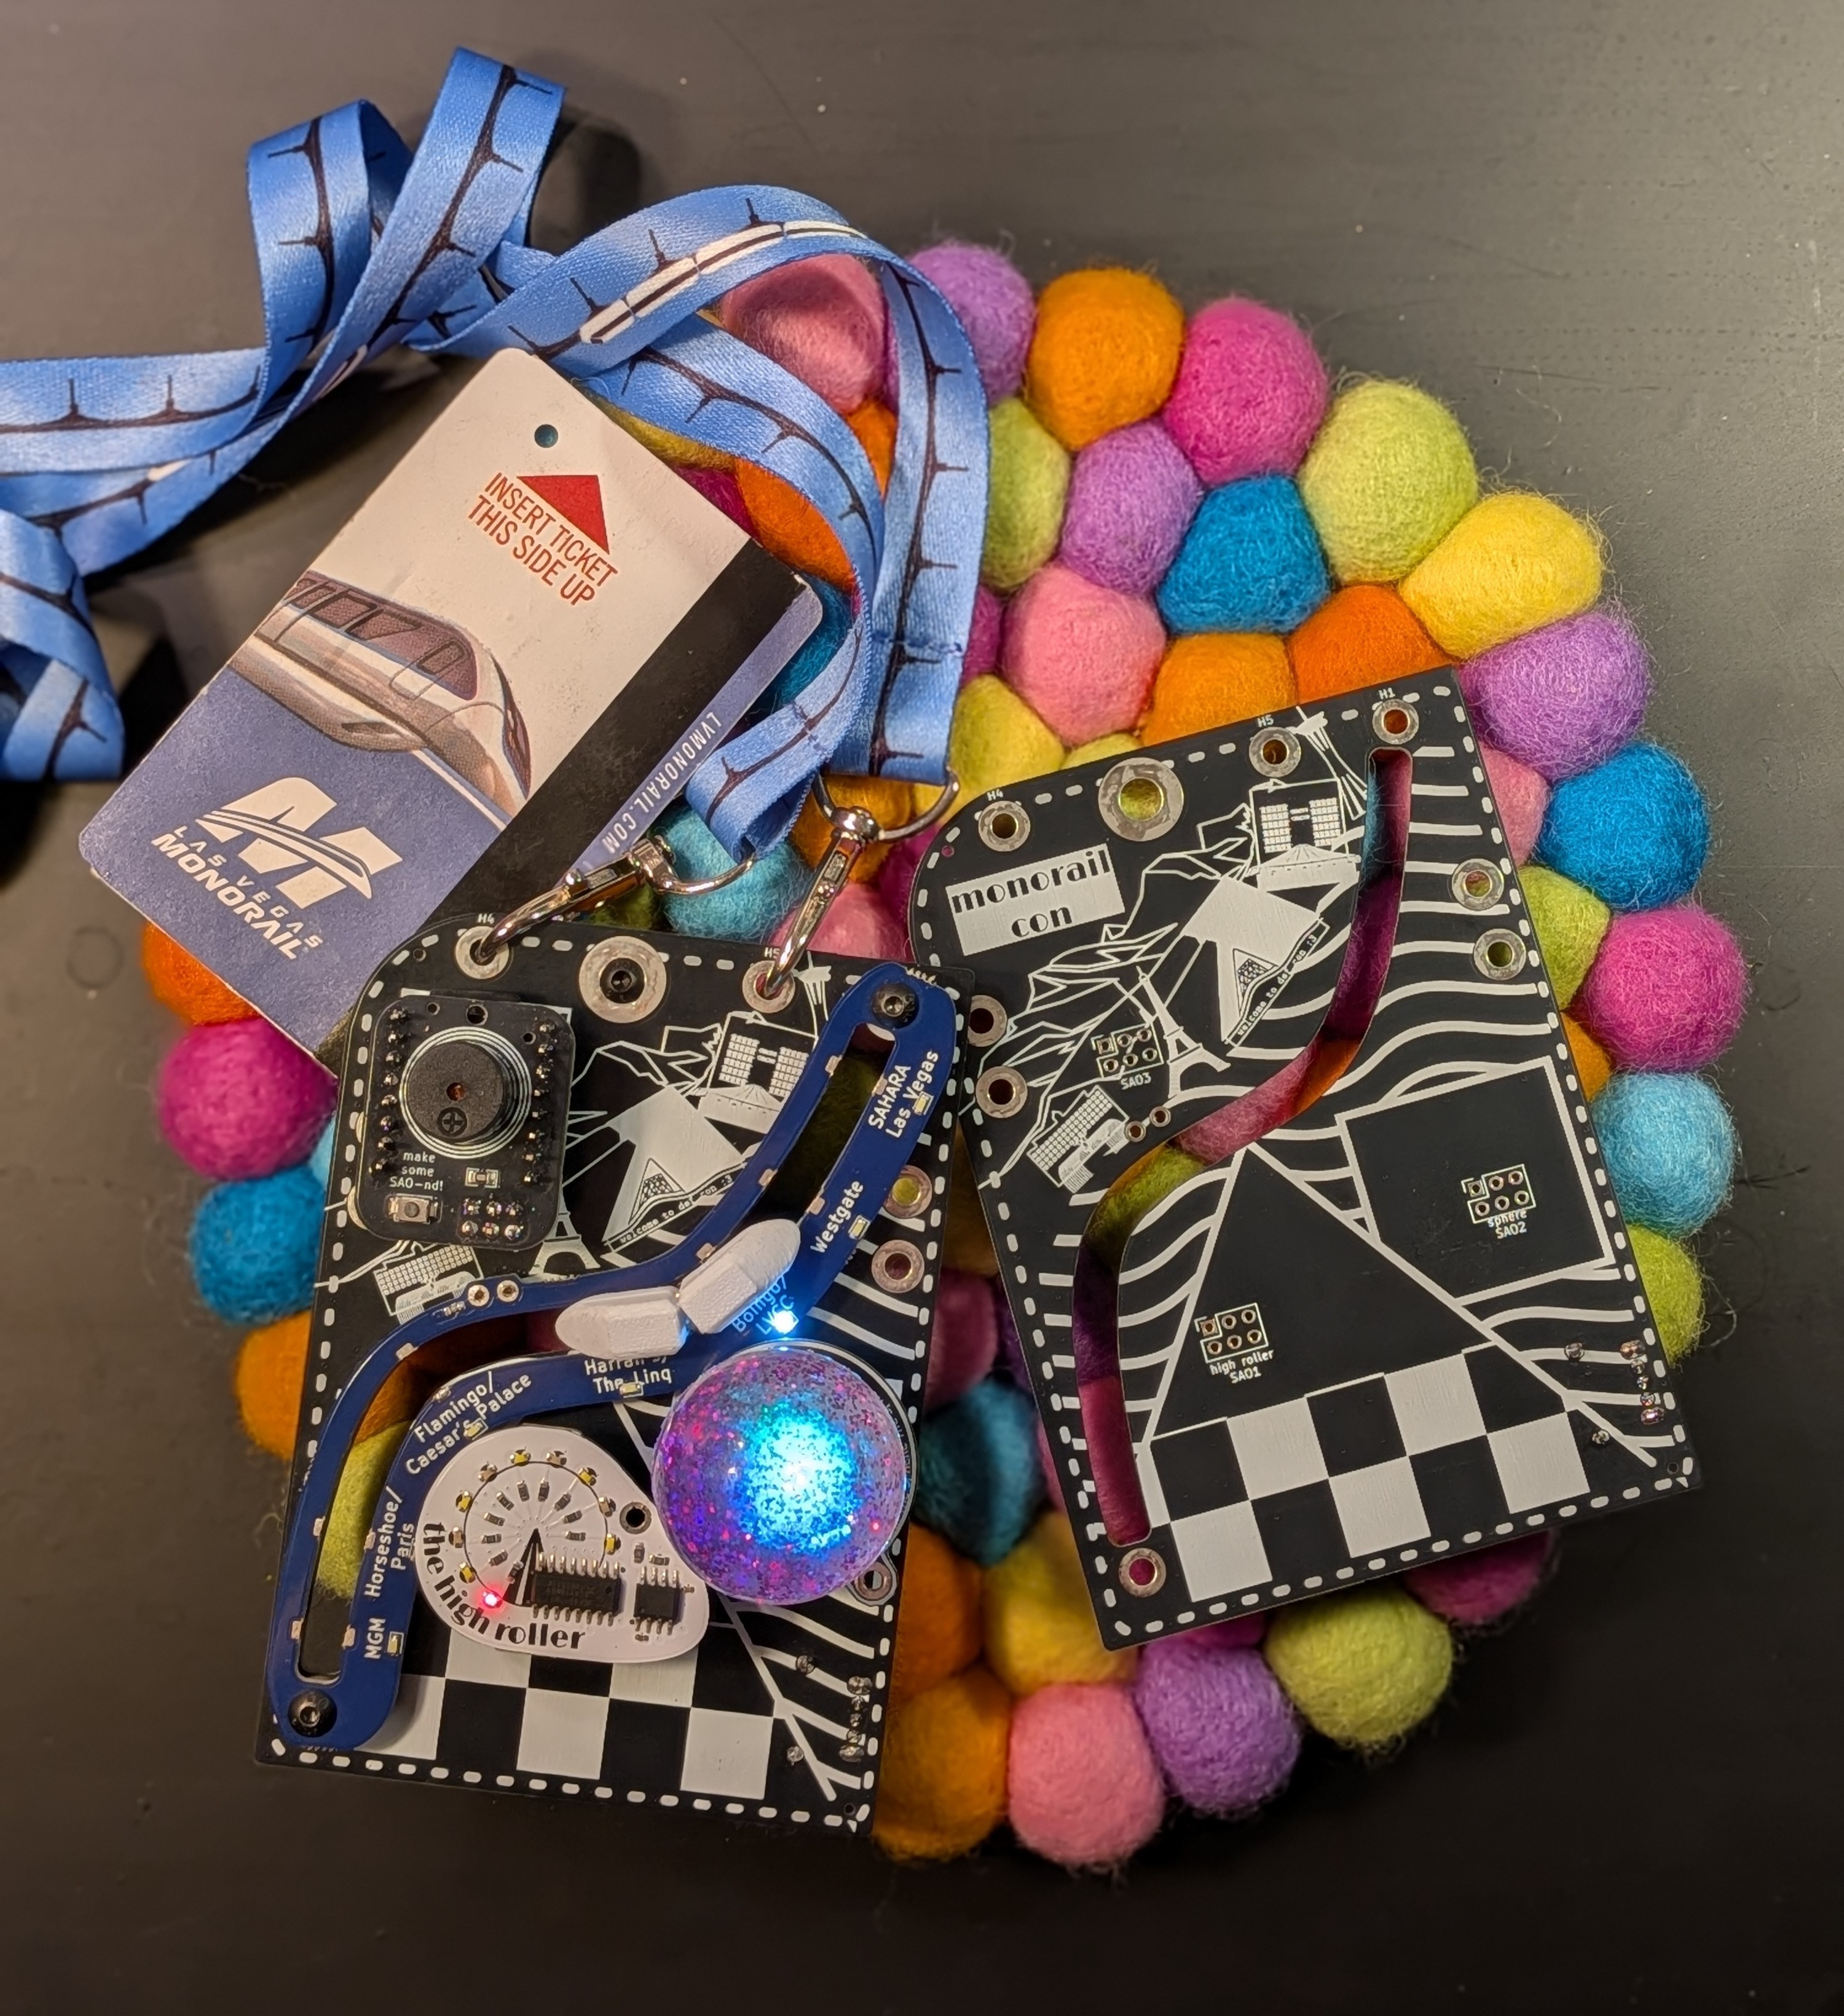
Something like this has been in the back of my mind since riding the monorail at DEF CON two years ago, and now it exists! There were a lot of changes and the scope didn’t so much creep as experience a landslide, but I like where it ended up.
Project files
All the information you need to make your very own monorail con badge is available here!
Be aware if you decide to make one that there are a lot of pieces (5 different PCBs and a variety of little hardware bits and bobs that seem to come in packages of 100). If you do make it, I’d love to hear how it goes!
History
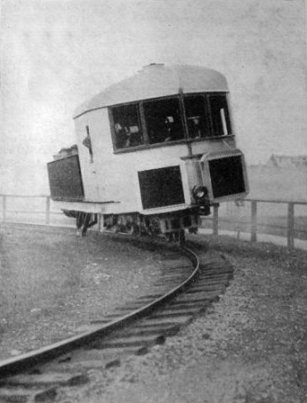
Verlag Diek & Co; Scan: Anton, Public domain, via Wikimedia Commons
Initially the plan was for an SAO about the size of the monorail ticket. It was promoted to a full badge after it started growing its own SAOs.
The track with the little monorail and ticket clipboard were part of the plan from the beginning. I also wanted it to play sound, but I thought that would be difficult or expensive and didn’t even try at first, so the speaker SAO was a late addition despite being one of the earliest ideas.
I also stumbled on this printed motor design and spent a while thinking of how to make that work in a badge format, but it didn’t seem possible. But it would be so cool! Maybe I’ll do something like that in a future project.
Monorail track
The first version of the track used metal contacts that a ball bearing would bridge when rolling past. That didn’t work well at all. The ball doesn’t make a good enough contact to reliably light up an LED so it is very flickery, and it’s virtually impossible to tighten the track down enough to get a good contact but also allow the ball to roll freely.1
Eveyrone I mentioned this plan to said that would probably happen, so I hedged and also put some footprints on the board for a backup plan.
Magnets!
The backup plan was a hall effect switch at each station, and a magnet inside the monorail car to trigger the switches.
I learned after ordering the boards that most hall effect switches are active low, meaning when there is a magnet nearby they put out a low voltage. The design I ordered required an active high switch. Oops.
I also learned that hall effect switches work by sampling the magnetic field at some fixed rate, so the ones with higher sample rates use a decent amount of power just existing. To reduce the amount of power, I needed to pick one with a relatively low sample rate.
After a day of combing through datasheets and learning the Chinese characters 低 and ⾼, I found that TI makes exactly what I need!2 Hooray.
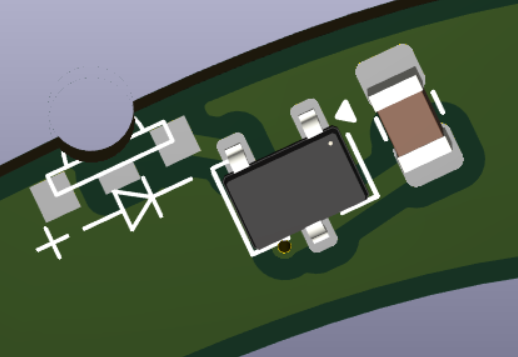
I reworked about 30 of the original boards, and also ordered a second revision. It costs much less to assemble if all the parts are on one side of the board, so for the station markers I put side mounted LEDs very close to the edge with cutouts that light can shine through to the front.3
Firmware
There’s no firmware!4 I wanted to explore what can be done without a general purpose microcontroller, so there isn’t one.
The highroller SAO uses a 555 timer and decade counter to blink some LEDs in a circle. The speaker uses a DFplayer Mini MP3 player module with one button to cycle through the MP3s. The sphere is an LED with color changing built in. The hall switches on the track directly control their LEDs (rather than informing a CPU that it should something with neopixels).
I’ve questioned sometimes if this is an interesting or useful piece of hardware. The honest answer is probably “no”, since it doesn’t do anything and there’s no puzzle. Its entire purpose is pretty much to look cool. I hope the SAOs at least make their ways onto other badges and get reused.
Power
Regulation
AA and AAA batteries provide a nominal 1.5V, but that’s not true for long since it drops off as they drain. They start out a bit higher than 1.5V, then stop being able to provide a useful amount of current below 0.8 volts or so.
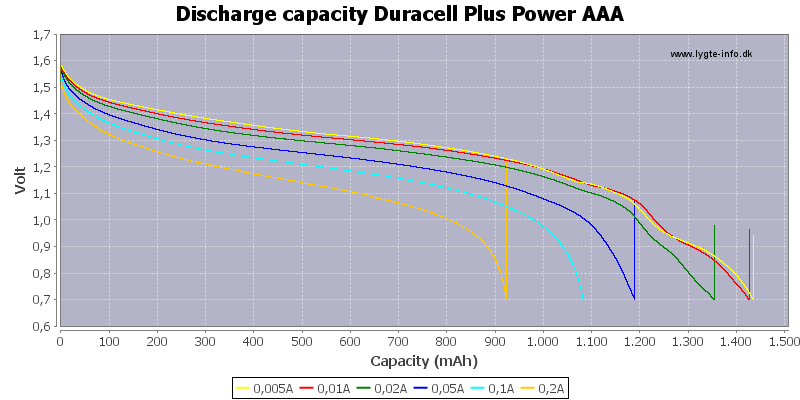
The white LEDs I chose need 2.9 volts to operate, and the DFPlayer mini needs 3.2. Maybe they’d work a little below that, but certainly not well. Suppose I get lucky and it’s actually usable down to 2.6 volts; I’d only get ~500 mAh out of the batteries!
With a boost converter/regulator, the badge works down to about 1.5 volts (.75 from each battery), so based on the chart I’m conservatively getting 1000 mAh out of the batteries. The regulator introduces some inefficiency, but certainly not enough to matter when it doubles the usable battery capacity.
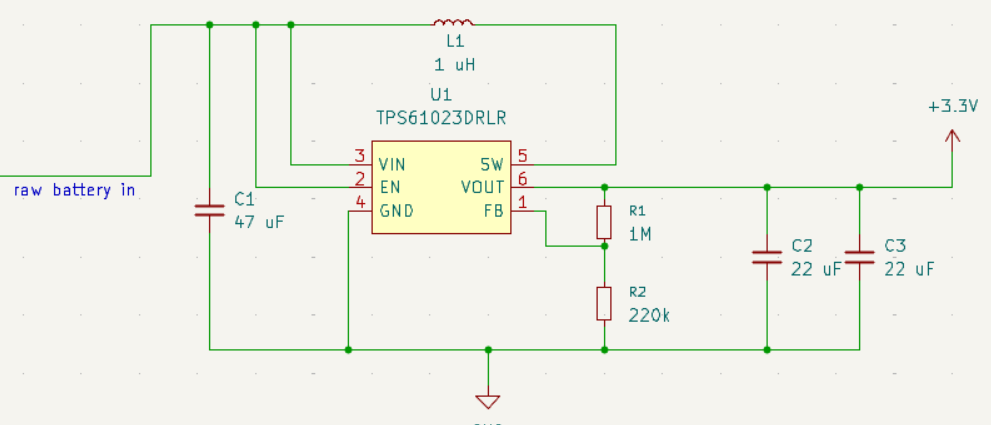
It took a while to figure out how to do this! There are various suggestions from 10-20 years ago scattered around the internet, but the specific parts had all been discontinued. I came across “jellybean” parts like the MC34063 (a nonstarter since it has a minimum input voltage of 3V), but none of them were what I wanted. Eventually I found the TI Webench power designer, which suggests designs based on the input and output voltages.
The Webench tool provided a short list of components, then I finalized the design with a TPS61023DRLR based on its datasheet. I almost certainly committed some capacitor selection crimes, but there are no high speed signals or delicate ICs at risk here. So far it seems to be working.
Reverse battery protection
The badge runs on batteries, and I didn’t want the out-of-box experience tp include destroying it by putting them in backwards.5
One way to solve this problem is with a diode, but the voltage drop would be disappointing, especially after all the effort I’ve taken to boost the voltage to 3.3V.
TI describes a better approach6: one carefully placed MOSFET. The report says “In the past [before 2003], the primary disadvantage of these circuits has been the high cost of low rDS(on), low-threshold voltage FETs.”
An AO3415A MOSFET is like 3 cents now, so that’s officially no longer a concern.
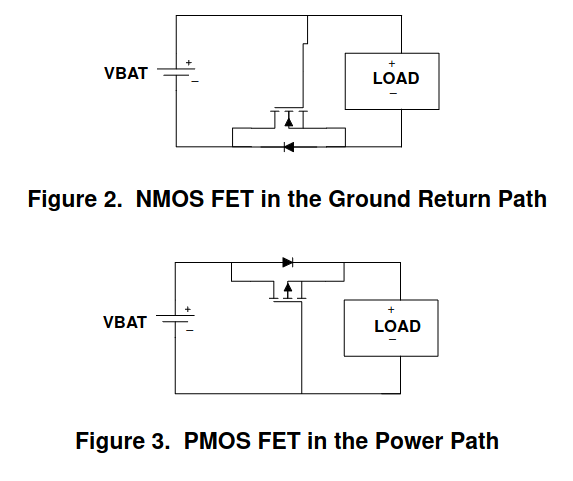
I’ve seen several badges whose reverse battery protection is silkscreen text telling people not to plug the battery in backwards, which feels prone to error. It’s possible there’s a good reason to do that instead of the MOSFET, but I wonder if they just didn’t know it was this cheap and easy. Hope this helps someone!
3D Printing
I am deeply distrustful of printers, and at the end of the day, a 3D printer is still a printer. This is sometimes overlooked because it appears to be a Fun Gadget for Tech Hobbyists, but it is a wolf in sheep’s clothing, and deserves just as much wariness as its 2D cousins.7
This was my first time designing something to 3D print. I used TinkerCAD, which worked well enough for an “eyeball it and cut once. Eh, cut a little more off. Cut thrice? Looks all right” strategy. The barrier to entry was also extremely low, which can’t be said of much CAD software.8
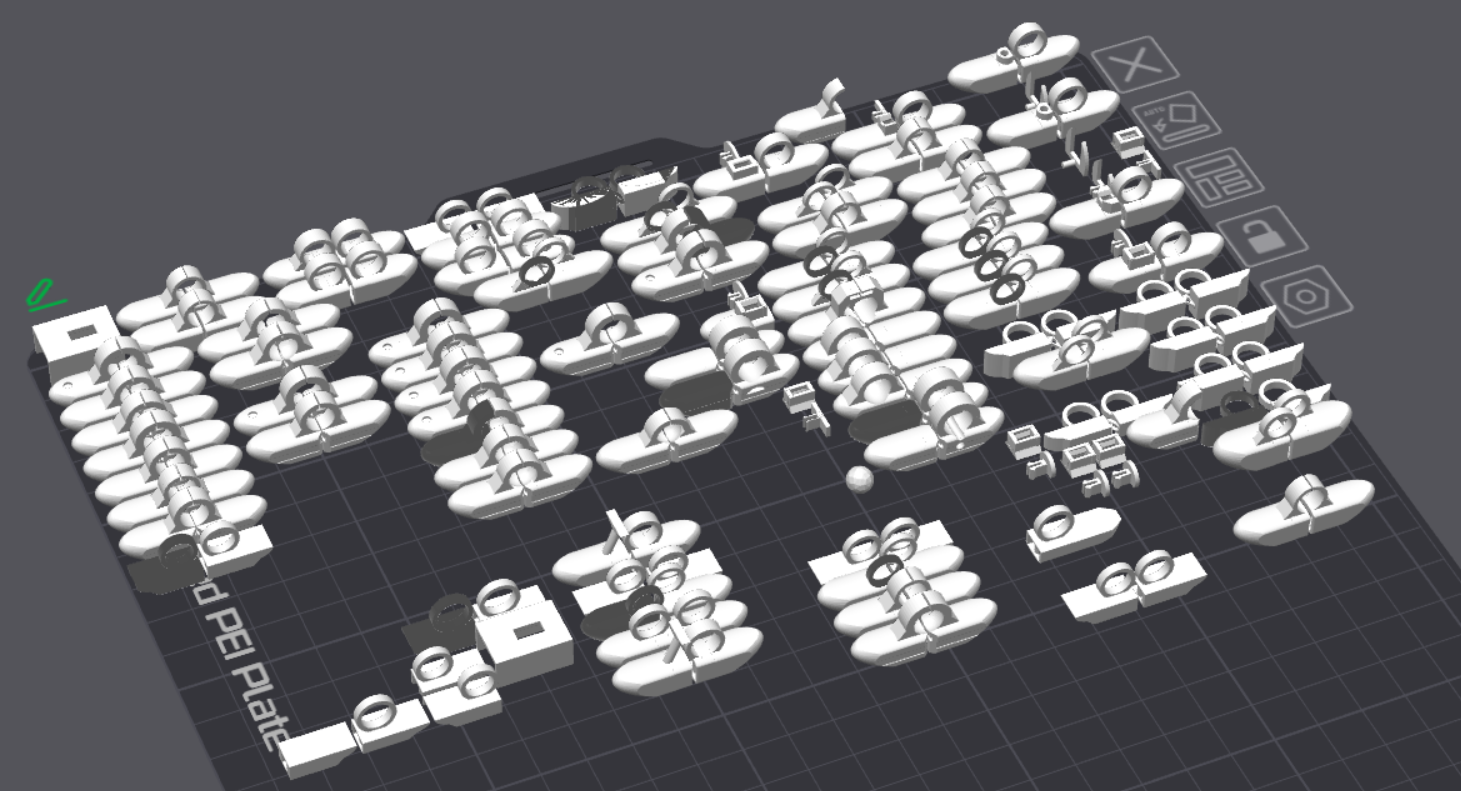
The road to the final design was paved with a lot of PLA
The monorail cars are so small and detailed that I got a tour of everything that can go wrong with a print. High humidity, clogged filament, heat creep, stringing, drips, the fan literally blowing the part off the print bed, etc. It didn’t help that before printing the last batch, we had a couple of weeks of extremely hot humid weather and no air conditioning.
The video “You can print much SMALLER than you think” explained some settings that are helpful to change when printing a tiny object with overhangs. Unfortunately, a lot of information about 3D printing is A. superstition, and B. in video format. This video was helpful, but I do wish it had jus tbeen written down somewhere.9
Lil monorail
The real monorail has four cars, but that would have either taken up the whole track or been too tiny and fragile, so I took some artistic liberties. Two articulated cars seemed like enough.
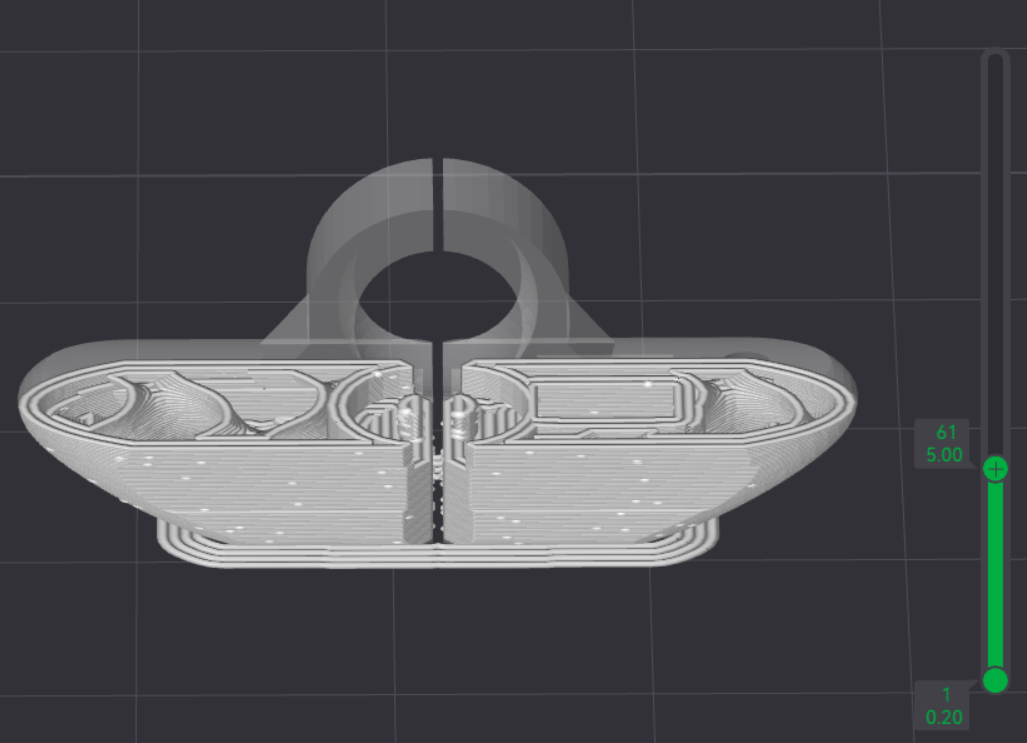
I connected them with a metal ring inserted during a pause in the print. It also needed a magnet somewhere for the hall switches, so I used the same trick. Pause the print, put in a magnet, then keep printing over the top. Apparently that is not always a good idea since the magnet can stick to the print head, but I never had that happen. The monorails were printed close together in rows, and the magnets seemed to hold each other in place through the sides of the cars.
I tried painting the windows on a few of them, but I am not good at painting so it looked bad. It’s possible I could have had JLC3DP or somewhere print the design in resin or multiple colors, but I don’t know if they would have been able or willing to put in the parts that had to be inserted during the print. I don’t even know if you can do that with resin.
Overall, I’m pleased with how this turned out, and hopefully the slight imperfections give it character.
-
After finalizing an ordering a design, I watched this talk (LEDs Get Into Formation: Mechanically Interesting PCB Assemblies - Debra Ansell), and agree with the conclusion that it’s best to keep mechanical and electrical concerns as separate as possible. ↩︎
-
The TMAG5231A2DQDBZCRT-ND (the A2D specifies it’s active high). There are a few others out there, but this was the only one in stock at a decent price. ↩︎
-
The LEDs (Chongtian CT-3210UWC-P15) had no picture on LCSC, no footprint file, and the datasheet was all in Chinese, so that was some interesting footprint-making practice ↩︎
-
More accurately, I didn’t write any firmware. The DFplayer mini reads files off of a filesystem so there’s got to be some firmware in there somewhere. It was a black box for the purposes of this project, though. ↩︎
-
Especially since I accidentally put the battery holder on backwards in the first version… ↩︎
-
This post is making me sound like a shill for TI. I have no particular loyalty, but they had all the freely available helpful resources (that happen to steer you to their products.) ↩︎
-
I used a Bambu printer, which was actually very easy to get working, but it wants you to send a lot of data and maybe a little bit of your soul to the cloud. Bambu has created a comfortatble but closed 3d printing ecosystem, and I did not have the energy to break out of it during this project. I don’t like it, though, and there are ways around it to explore later. ↩︎
-
The corollary of that is that there are a lot of features it doesn’t have. One day I’ll learn OpenSCAD or Blender or something. ↩︎
-
The format of text and screenshots was killed by SEO articles, and its grave is being danced on by LLMs. I still like it, though. ↩︎